Securing your Azure DevOps Ecosystem, Jenkins and Kubernetes (AKS) – Part 2
The first part of the series about securing your Azure DevOps ecosystem covered Jenkins and the integration of Codenotary into your Jenkins pipeline. That way you an easily notarize everything that gets produced in your very own pipeline. If you want to double check the blog post – please click here.
This second part covers the authentication process when your Jenkins pipeline deployed container into your Azure Kubernetes (AKS). That way you can make sure, that nothing unknown or unwanted runs in AKS. You can of course configure alerts as well.
If you want to learn more about Notarization and Authentication, please check this blog post first: https://hackernoon.com/the-day-we-started-to-protect-devops-with-blockchain-a9g6y33gt
But let’s start step by step.
Azure Kubernetes Service (AKS)
Azure Kubernetes Service is an important part of the Azure DevOps Ecosystem and allows a very easy and straightforward deployment of services running on Kubernetes. The AKS environment used for this blog post has been nicely described here: https://medium.com/@adilsonbna/building-my-own-azure-devops-ecosystem-ef92b8db9da5
Azure AKS Login
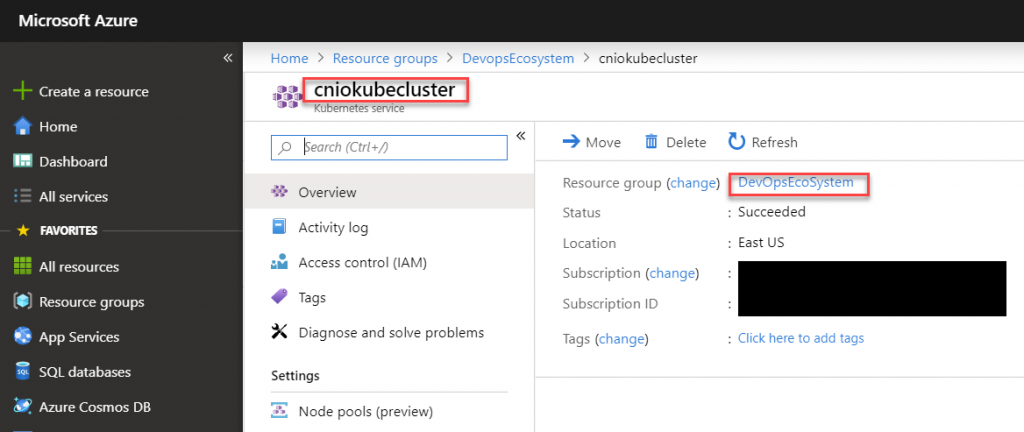
Azure AKS can be added to your local kubectl config in a very simple way. Check your resource group and the name of the AKS deployment in your Azure Console:
# add AKS access to .kube/config
az aks get-credentials --resource-group DevopsEcosystem --name cniokubecluster
If you don’t have az installed, please check out the following page: https://docs.microsoft.com/en-us/cli/azure/install-azure-cli?view=azure-cli-latest
# list all Kubernetes services in the current namespace
kubectl get svc
Helm deployment
The easiest installation of Codenotary for Kubernetes is using a helm chart (alternatives are described in the repository). If you haven’t deployed helm yet, you can follow this guide.
Create a file helm-rbac.yaml
# create a tiller service account - helm-rbac.yaml
apiVersion: v1
kind: ServiceAccount
metadata:
  name: tiller
  namespace: kube-system
---
apiVersion: rbac.authorization.k8s.io/v1
kind: ClusterRoleBinding
metadata:
  name: tiller
roleRef:
  apiGroup: rbac.authorization.k8s.io
  kind: ClusterRole
  name: cluster-admin
subjects:
  - kind: ServiceAccount
    name: tiller
    namespace: kube-system
Deploy the Helm (Tiller) service account into your AKS
kubectl apply -f helm-rbac.yaml# install helm and deploy tiller
helm init --history-max 200 --service-account tiller --node-selectors "beta.kubernetes.io/os=linux"# check installed helm charts
helm list
# check helm and tiller (server) version
helm versionAzure AKS Kube-Notary deployment
Now you can deploy Kube-Notary using helm by simply cloning the repository and issuing a helm install command.
# clone git repository
git clone https://github.com/vchain-us/kube-notary.git
cd kube-notary

# deploy Kube-Notary
helm install -n kube-notary helm/kube-notary --namespace=monitoring

# you can check the status of Kube-Notary at any time using
helm status kube-notary
What happened when deploying the Kube-Notary helm chart?
The following resources are getting deployed to mainly support one Pod that consistently checks all running container /images/blog if they have been signed (you need a free account for that) using Codenotary:
- ClusterRole
- ConfigMap
- Deployment
- Pod(related)
- Service
- ServiceAccount
- ClusterRoleBinding
Please keep in mind, that Kube-Notary checks by default if a container image has been notarized on Codenotary.io. But most of the time you only care about what you notarized, someone in your team or organization.
Configure a list of trusted keys
Lists can be expressed by enclosing keys in { and } separated by ,. For example:
helm install -n kube-notary helm/kube-notary --set "trust.keys={0x123..., 0x123...}"Configure a trusted organization
helm install -n kube-notary helm/kube-notary --set "trust.org=your.organization.com"Note
If both trust.org and trust.keys are set, only trust.org will be used.
If none is set, the last signature by the signer with the highest available level will be used during the verification.
You can find more information in the GitHub repository.
Check the Kube-Notary service
Kube-Notary comes with all common ways to extract information by default.
- Log output – to be consumed by ELK, Fluent or any other log collector
- Prometheus output – Kube-Notary pod gets automatically detected and scraped by a Prometheus server (if configured to scrape pods)
- json results page (can be checked manually or automatic)
- realtime status dashboard
If you want to check the output on your local system, you can use kubectl to forward the endpoint:
# find Service
export SERVICE_NAME=service/$(kubectl get service --namespace monitoring -l "app.kubernetes.io/name=kube-notary,app.kubernetes.io/instance=kube-notary" -o jsonpath="{.items[0].metadata.name}")

  # Metrics endpoint
echo "Check the metrics endpoint at "
kubectl port-forward --namespace monitoring $SERVICE_NAME 9581

  # Results endpoint
echo "Check the verification results endpoint at "
kubectl port-forward --namespace monitoring $SERVICE_NAME 9581

  # Status page
echo "Status page at "
kubectl port-forward --namespace monitoring $SERVICE_NAME 9581

  # Stream logs
export POD_NAME=$(kubectl get pods --namespace monitoring -l "app.kubernetes.io/name=kube-notary,app.kubernetes.io/instance=kube-notary" -o jsonpath="{.items[0].metadata.name}")

kubectl logs --namespace monitoring -f $POD_NAME
The status page might look like that, depending on the number of notarized container /images/blog.
- Trusted: you notarized the image (or someone, depending on you Kube-Notary configuration)
- Untrusted: you untrusted the image (or someone, depending on you Kube-Notary configuration)
- Unsupported: you unsupported the image (or someone, depending on you Kube-Notary configuration) . That’s typically a good idea, when you release a newer image that should be used instead.
- Unknown: Container image has not been notarized at all on Codenotary.io
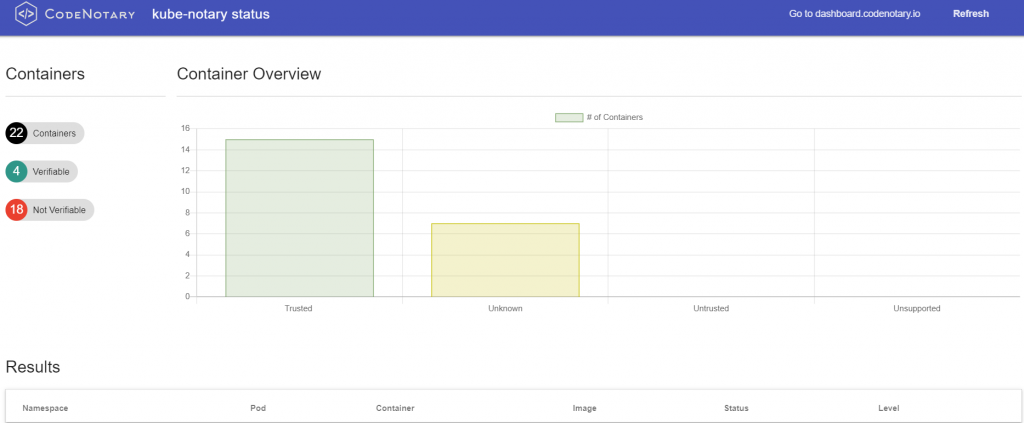
Kube-Notary status page
Notarizing (Trust, Untrust, Unsupport) Azure AKS container /images/blog
Notarizing the first /images/blog on Codenotary is key for Kube-Notary to be useful. You can find a complete guideline how to work with Codenotary here.
https://docs.Codenotary.io/guide/quickhelp.html
When you start using Kube-Notary, you might want to notarize the status quo and move on more strict afterwards. Honestly if you don’t trust the container /images/blog that are currently running, that might be an issue anyway.
# Bulk sign all running
export POD_NAME=$(kubectl get pods --namespace monitoring -l "app.kubernetes.io/name=kube-notary,app.kubernetes.io/instance=kube-notary" -o jsonpath="{.items[0].metadata.name}")

kubectl exec --namespace monitoring -t $POD_NAME sh /bin/bulk_sign > vcn_bulk_sign.sh

chmod +x vcn_bulk_sign.sh && ./vcn_bulk_sign.sh
The moment you start notarizing container /images/blog, you’ll notice the changes in your Status Dashboard.
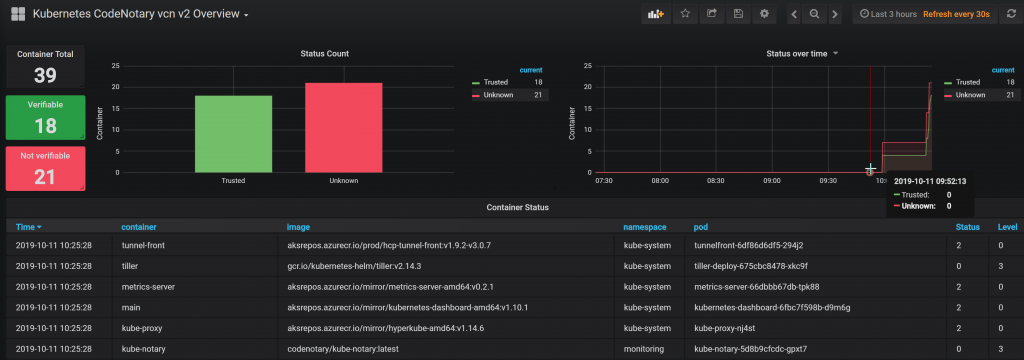
Prometheus and Grafana
As already mentioned, the Kube-Notary pod comes with Prometheus annotations and will be scraped immediately after the deployment, depending on your Prometheus configuration.
You can simply import the Grafana dashboard and you should see a nice dashboard version including notarization history.
The dashboard can be found here: https://grafana.com/grafana/dashboards/10339
Add your very own immutable Trust to any container image
You can finally add immutable trust to your DevOps pipeline. It doesn’t matter if you want to authenticate Sourcecode, binaries, configuration files or container /images/blog – Codenotary vcn supports all of these objects.
Using Codenotary and the Kubernetes extension Kube-Notary allows you and your team to immediately secure and protect your running environment. No need to bother with complex GPG or TUF Notary installation, configuration and annoying digital certificates. Codenotary doesn’t change the objects, but calculates an unique checksum and stores that including your trust level in an immutable way.